
Key Words: Silicon Wafer Dicing PCB Depaneling Glass Cutting
Home > News > Company News
【Description】:
A comprehensive troubleshooting guide to diagnose and resolve common CO2 laser cutting defects including start point misalignment, incomplete cuts, and jagged edges.
CO2 laser cutting is a precise and efficient manufacturing process, but achieving consistent cutting quality requires proper machine setup, regular maintenance, and timely troubleshooting. Even with high-quality CO2 laser equipment, users may occasionally encounter cutting defects such as start point misalignment, incomplete cuts, or jagged edges. This guide provides a comprehensive troubleshooting approach to help you diagnose and resolve common CO2 laser cutting quality issues.
| Problem | Typical Symptom |
|---|---|
| Start Point Misalignment | The laser start and end points do not meet after completing a closed cut. |
| Incomplete Cut | Material is not fully penetrated in certain sections. |
| Jagged Cut Edge | The cut line appears rough, wavy, or serrated. |
Let's examine each issue in detail and explore the root causes and solutions.
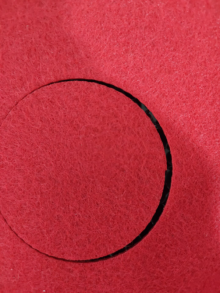
After the laser completes a full cutting loop—such as a circle or rectangle—the starting point and the ending point do not align. This results in an open seam or overlapping cut line, which compromises part accuracy.
Incorrect software compensation settings
Loose belts, pulleys, or gears in the drive system
Mechanical play in the gantry or guide rails
Software Adjustment:
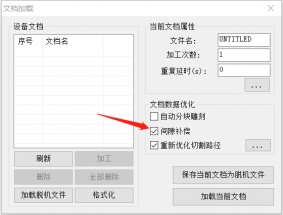
Open your LaserCAD software. Navigate to the Layer Settings page and enable the Gap Compensation option. This software feature automatically corrects minor mechanical deviations during cutting.
Mechanical Inspection:
Check the belt tension on both sides of the machine guide rails. Ensure that all pulleys and gears are properly tightened. Excessive looseness in the mechanical drive train is a primary cause of start point misalignment in CO2 laser cutting systems.
Pro Tip: Always perform a test cut on scrap material after making adjustments to verify the alignment before running production jobs.
The laser beam cuts through most of the material but fails to penetrate fully in certain areas. This issue is particularly noticeable when cutting thicker materials or intricate patterns.
Incorrect focal distance
Dirty or damaged focusing lens or mirrors
Optical path misalignment
The focal distance is critical for concentrating laser energy onto the material surface.
The ideal distance between the laser nozzle tip and the material surface is approximately 5 mm for most CO2 laser cutting applications.
Adjust the Z-axis height to achieve the correct focus position.
Incorrect focus is one of the most common reasons for incomplete cutting in CO2 laser systems. Always verify focal height before starting a new job.
Optical components accumulate dust, residue, and condensation over time, which can absorb or scatter the laser beam.
Refer to your machine manual for cleaning procedures.
Carefully clean the focusing lens and all reflection mirrors using lens tissue and approved optical cleaner.
Ensure the focusing lens is reinstalled correctly with the proper orientation.
Contaminated optics can reduce effective laser power by 30% or more, leading to incomplete cuts. Regular optical maintenance is essential for consistent cutting performance.
Optical path misalignment is a leading cause of uneven power distribution across the cutting bed.
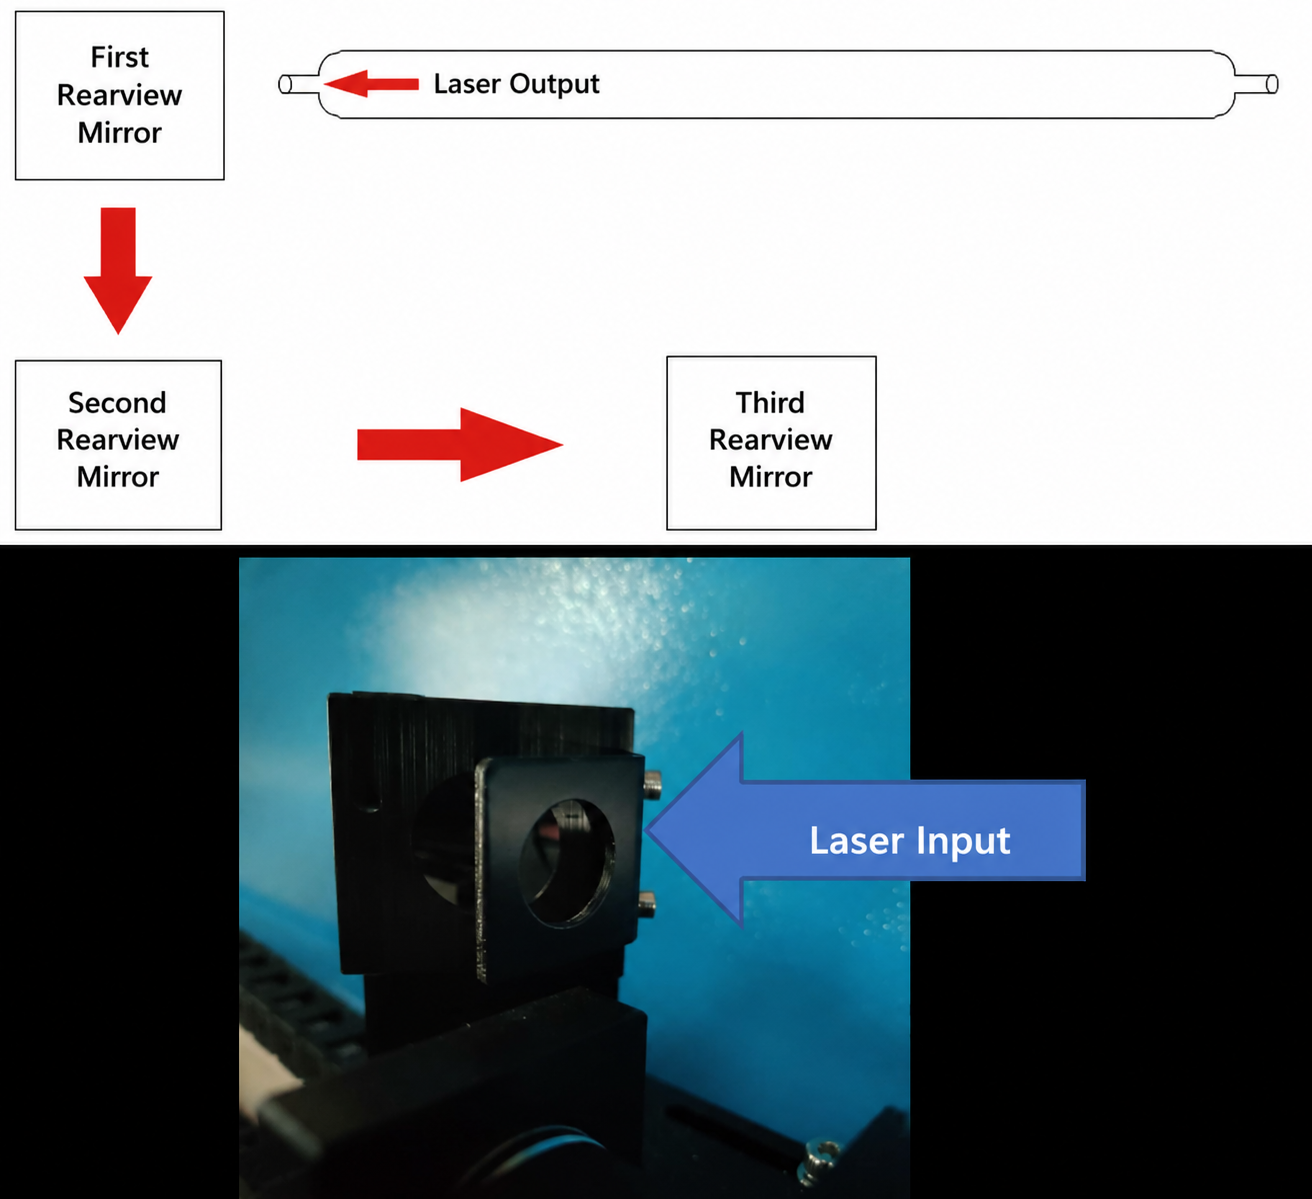
Mirror 1 and Mirror 2 Alignment (Y-Axis – Front to Back):
Stack three layers of double-sided tape and place them over the light entrance hole of Mirror 2.
Fire a low-power test pulse at the Y-axis nearest position (closest to the laser source).
Move to the Y-axis farthest position (furthest from the laser source) and fire another test pulse.
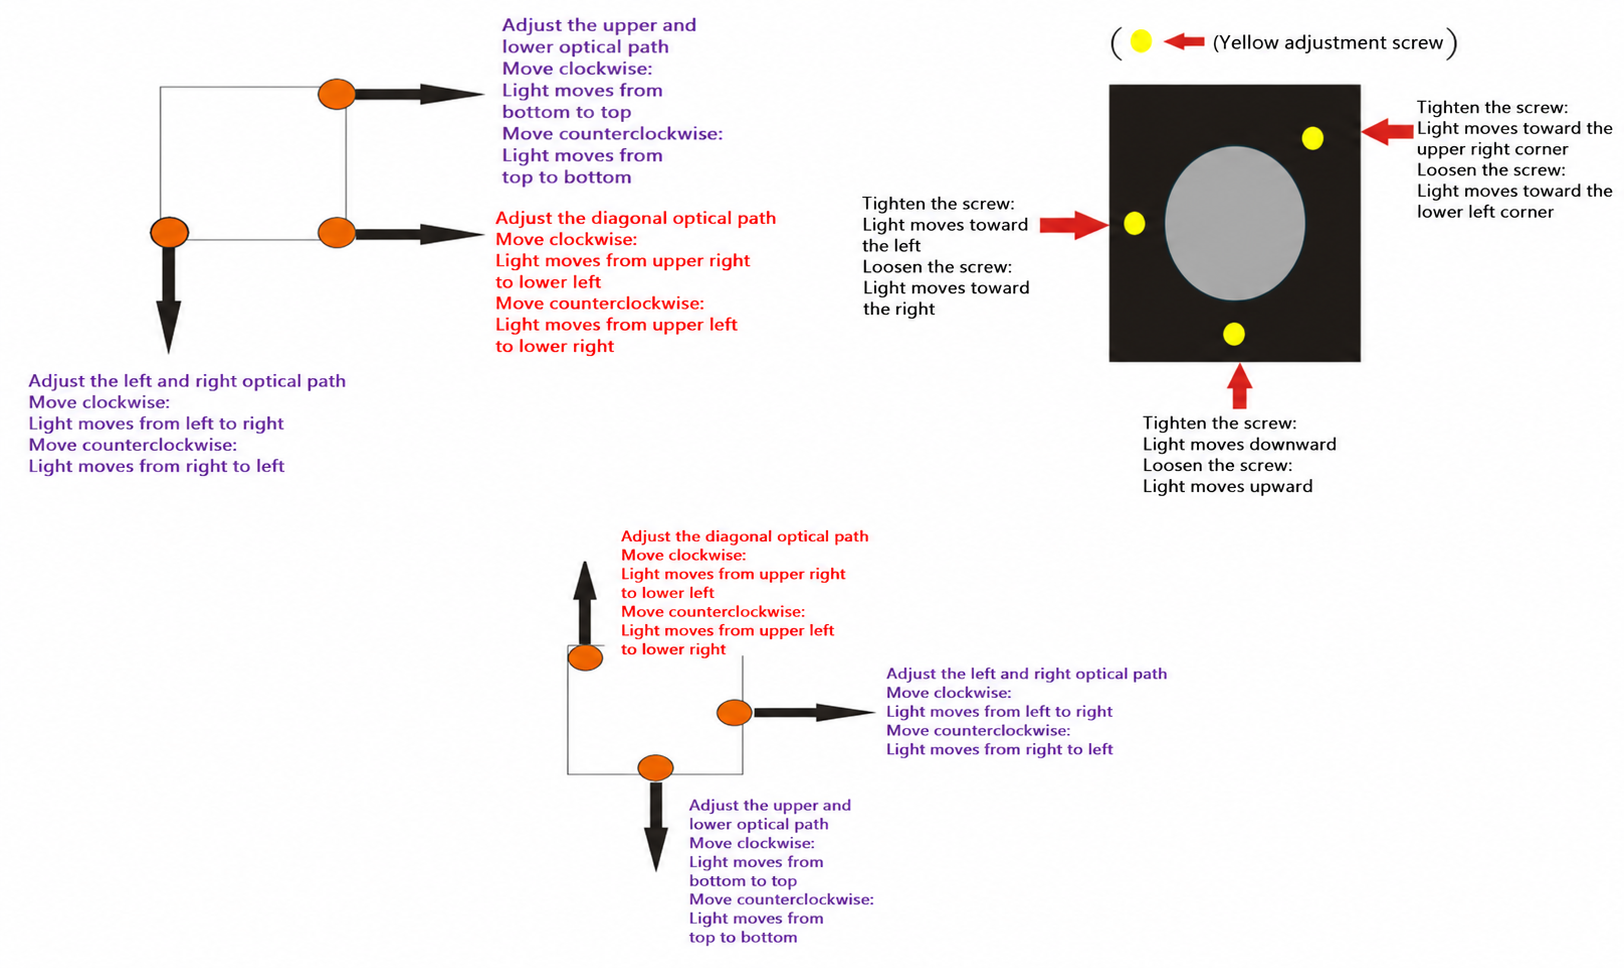
If the two spots do not overlap, adjust the yellow adjustment screws on Mirror 1 until the farthest spot aligns with the nearest spot.
Mirror 2 and Mirror 3 Alignment (X-Axis – Left to Right):
Place fresh tape over the light entrance hole of Mirror 3.
Fire test pulses at the leftmost and rightmost positions.
If the spots do not overlap, adjust the yellow screws on Mirror 2 until they do.
Vertical Alignment (Z-Axis – Through the Nozzle):
Place tape over the bottom of the laser nozzle and fire a test pulse.
Remove the cone-shaped nozzle and check if the spot is centered in the circular hole.
If not centered, make fine adjustments using the three yellow screws on Mirror 3 until the beam passes through the exact center.
Alignment Sequence (Mandatory): Always align in this order: Y-Axis → X-Axis → Vertical (Z-Axis). Each alignment step depends on the previous one, so the sequence is critical for proper optical path calibration.
The cut edge appears rough, wavy, or serrated instead of smooth and straight. This defect is especially visible on straight lines and curves.
Loose belts or pulleys causing mechanical vibration
Worn guide rails, bearings, or transmission components
Improper cutting speed and power settings
Loose mirror mounts affecting beam stability
| Checkpoint | Action |
|---|---|
| Belt tension | Adjust belts on both sides of the X/Y axes; eliminate slack. |
| Gears and pulleys | Tighten all set screws; inspect for wear. |
| Guide rails | Clean and lubricate rails; check for smooth motion. |
| Speed and power | Reduce cutting speed or increase power to achieve a smoother cut. |
| Mirror mounts | Ensure all mirror housings are securely fastened to prevent vibration. |
Jagged cutting edges are almost always mechanical in nature. Start by checking belt tension and mechanical rigidity before adjusting laser parameters.
To minimize downtime and maintain superior cutting quality, follow these preventive maintenance practices:
| Maintenance Task | Frequency |
|---|---|
| Clean focusing lens and mirrors | Daily or weekly (depending on usage) |
| Check and adjust belt tension | Weekly |
| Inspect gears and pulleys | Weekly |
| Verify optical path alignment | Monthly or after any machine movement |
| Clean guide rails and apply lubricant | Monthly |
| Check focal distance | Before each new job |
If you have followed all the troubleshooting steps above and cutting quality issues persist, please do not hesitate to contact the Chanxan Technical Support Team. We are committed to providing comprehensive after-sales service for all Chanxan laser equipment users.
When reaching out, please prepare the following details to help us assist you more efficiently:
Machine model and laser wattage
Material type and thickness being cut
Photos of the cutting defect
Current power, speed, and frequency settings
Optical path test spot photos (if available)
Our experienced support engineers will respond within 24 hours to diagnose the issue and provide professional guidance. Whether you need remote assistance, replacement parts, or on-site service, Chanxan's global support network is ready to help you get your production back on track.
Chanxan After-Sales Commitment: Every Chanxan laser system comes with dedicated technical support, including free training, video tutorials, and lifetime access to our troubleshooting knowledge base. Your satisfaction is our priority.
Achieving high-quality CO2 laser cuts requires a combination of proper software settings, precise optical alignment, and regular mechanical maintenance. By systematically troubleshooting start point misalignment, incomplete cuts, and jagged edges, you can quickly identify root causes and restore your machine's cutting performance.
Regular preventive maintenance not only improves cut quality but also extends the lifespan of your Chanxan laser equipment—reducing downtime and maximizing production efficiency.
Have questions about your Chanxan laser cutter? Our technical support team is just one call or email away. Visit our official website or contact your local Chanxan representative for prompt assistance.
| Free solution