
Key Words: Silicon Wafer Dicing PCB Depaneling Glass Cutting
Home > News > Company News
【Description】:
Resolve poor fume extraction in laser processing: check sealing and clear blockages. Complete step-by-step diagnostic guide with maintenance and Chanxan support.
In laser micromachining, effective fume extraction is essential to maintain beam quality, protect optical components, ensure operator safety, and achieve consistent process results. When extraction performance drops, you may notice smoke lingering around the cutting area, residue building up on lenses, or unpleasant odours spreading through the workspace.
This guide provides a systematic, field-tested approach to diagnosing and resolving poor fume extraction. The steps are arranged from the simplest and most common causes to more involved checks, ensuring you can quickly restore full suction power without unnecessary downtime.
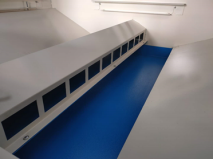
A typical laser fume extraction system consists of:
A worktable with a perforated or slotted surface and a sealed plenum underneath.
An extraction duct or hose connecting the table to a fan/blower unit.
A filtration system (e.g., dust collection drawer, bag filter, or HEPA/carbon filters) that traps particulates and gases.
The fan/blower that creates negative pressure to draw air and fumes away from the cutting point.
When extraction weakens, the root cause is almost always either a loss of negative pressure at the cutting zone (due to air leaks) or a restriction in airflow (due to dust buildup). The diagnostic procedure below addresses both.
The extraction fan creates a fixed volume of airflow. If the worktable has large open areas—uncovered slots, gaps around the workpiece, or missing filler plates—the suction is dispersed over a wide area. Instead of drawing fumes directly from the cutting kerf, the fan pulls air from every opening, drastically reducing capture efficiency at the point where it is needed most.
During processing, cover all unused areas of the worktable with solid cover plates, masking tape, or sacrificial sheets (e.g., cardboard or thin metal) that are compatible with the process.
Ensure the workpiece itself is placed to minimise gaps between its edges and the table surface. If processing small parts, consider using a jig or fixture that leaves only the cutting zone exposed.
Check that the extraction plenum (the chamber under the table) is properly sealed—no cracks or loose panels.
Diagnostic Tip: A simple visual test can reveal sealing issues. Turn on the extraction and place a piece of tissue paper near the edge of the table. If the paper does not get pulled firmly against the table surface, there is significant air leakage. Improve sealing until the tissue sticks to the table.
Over time, fine particulates accumulate inside the extraction duct, at the suction port, and in the filtration compartments. This buildup constricts airflow, reducing the effective suction power even if the fan is running normally.
Dust collection drawer or primary filter: Open the drawer and check the fill level. If it is more than 75% full, empty it. Also inspect the filter media (if washable) for clogging. A heavily loaded filter can choke airflow before it even reaches the fan.
Machine suction port (intake grille): Remove the grille and visually inspect the duct opening. Use a flashlight and mirror to check for accumulated dust cakes, stringy residues, or foreign objects that may be partially blocking the inlet.
Fan/blower intake port: Disconnect the duct from the fan inlet (or access the fan housing) and inspect the impeller and inlet screen. Dust and debris often collect on the impeller blades, reducing their efficiency. Clean with a soft brush or compressed air.
Full duct run: If the above areas are clean but suction remains poor, the blockage may be further along the duct—especially at bends or joints. Consider using a borescope or passing a cleaning rod through the duct to dislodge stubborn deposits.
Regular cleaning is the single most effective way to maintain consistent extraction. Many “sudden” extraction failures are simply the result of gradual buildup that finally reaches a critical threshold.
To prevent poor extraction from recurring, integrate the following cleaning routine into your production schedule:
| Component | Frequency | Action |
|---|---|---|
| Dust collection drawer / primary bin | Daily (or after each shift) | Empty and wipe clean. |
| Machine suction port (intake grille) | Weekly | Remove and brush off dust; inspect duct opening. |
| Fan intake port and impeller | Weekly | Check for debris; clean blades and inlet screen. |
| Full extraction system (ducts, filters, fan housing) | Monthly | Comprehensive inspection and deep cleaning; replace worn filters. |
Note: For high‑volume production of materials that generate fine, sticky residues (e.g., resins, adhesives, or certain polymers), consider increasing the frequency of weekly checks to every 2–3 days.
If you have completed both Step 1 (sealing) and Step 2 (cleaning) and extraction is still unsatisfactory, consider these additional possibilities:
Fan performance degradation: The fan motor may be losing power due to worn bearings, voltage fluctuations, or internal damage. Listen for unusual noise (grinding, whining) and check the motor temperature. Compare the fan’s airflow (using an anemometer) with the rated value if available.
Filter saturation: If your system uses HEPA or activated‑carbon filters that are not washable, they may have reached their end of life. Replace them according to the manufacturer’s service intervals—or earlier if you notice a marked drop in suction.
Ductwork leaks: Inspect flexible hoses for cracks or loose clamps. Even a small leak on the vacuum side can reduce suction significantly. Tape or replace damaged sections.
Incorrect fan speed setting: Some systems have variable‑speed controls. Ensure the fan is set to the appropriate speed for the material and thickness being processed.
Use this checklist to systematically document your inspection:
| Checkpoint | Pass (✔) | Fail (✘) | Action Taken |
|---|---|---|---|
| Worktable unused areas covered/sealed | |||
| Dust collection drawer emptied | |||
| Machine suction port cleaned | |||
| Fan intake port and impeller clean | |||
| Ductwork free of visible blockage | |||
| Fan motor runs smoothly and at correct speed | |||
| Filters (if any) replaced or cleaned |
If you have completed all diagnostic steps and the extraction performance is still unsatisfactory, the issue may involve a deeper mechanical fault—such as a failing fan motor, damaged impeller, or severely blocked internal ductwork that requires professional service. At Chanxan Laser, we understand that efficient fume management is critical to your production quality and uptime.
Please contact our technical support team with your completed test results, along with:
Machine model number
Extraction fan/blower specs or model
Photos of your worktable setup and ducting layout
*Our engineering team typically responds within 24 hours.
| Free solution
Previous: Air Pump Failure in Laser Processing Systems – A Complete Troubleshooting Guide
Next: Why Is My Laser Not Firing? A Complete Troubleshooting Guide